After reading a few different tactica articles written by fellow Texan MKerr (on the Bell of Lost Souls blog) relating to Witch Hunter retinues and Death Cult assassins, I'm going to take another hack at my sisters army. I got a little disillusioned in the past with their unreliability, but I realize now it was probably due to the limited variety of army lists my model collection could build. I figure I need to add a few heavy bolter servitors, two chirurgeons, some of the aforementioned death cultists, four sisters with flamers, another imagifer, and a sister superior with a bolter. Also I want to convert a nice acolyte with a bolt pistol from an unusual model that will match up with my redemptionist inquisitor figure... haven't found the right one just yet. After that I'll have a 2000 point army that will hopefully do a little better than mine has in the past. I actually have enough guard and weapons teams now to make a good inducted guard list that makes up for the sisters' lack of heavy weapons, but all that reading about assassins has my blood boiling for a pure inquisition/sisters army that has a dedicated assault wing. Here's a list I quickly put together to that end:
HQ:
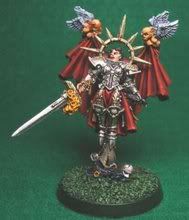
1 Cannoness - inferno pistol, jump pack, rosarius, cloak of st. aspira
ELITES:
1 Inquisitor - inferno pistol, close combat weapon
Retinue - 3 gun servitors with heavy bolters, 2 chirurgeons, 1 acolyte with bolt pistol/ccw
3 Death Cult Assassins
9 Sisters Repentia, 1 Mistress, 1 Priest with laspistol/power weapon
TROOPS:
9 Battle Sisters with 1 meltagun, 1 storm bolter, 1 imagifer, Vet Sister Superior with bolter and book of St. Lucius
9 Battle Sisters with 1 meltagun, 1 storm bolter, 1 imagifer, Vet Sister Superior with bolter and book of St. Lucius
FAST ATTACK:
9 Seraphim with 2 twin flame pistols, Vet Sister Superior with plasma pistol, eviscerator, and book of St. Lucius
5 Dominions with 4 flamers, 1 imagifer, Vet Sister Superior with bolt pistol, brazier of holy fire, and book of St. Lucius, 1 Immolator with extra armor, smoke launchers, and holy promethium
HEAVY SUPPORT:
1 Exorcist with extra armor
2 Penitent Engines
5 Retributors with 2 heavy bolters, 2 multimeltas, 1 Vet Sister Superior with bolter and book of St. Lucius
Altogether that's 7 faith points, 8 scoring units, 69 total models. It's still weak in long range firepower (no offense, Mr. Exorcist) but I think it makes up for that in mobility and good short range anti-vehicle damage. Horde armies get mass bolter, heavy bolter, and flamer fire, and marine equivalents get shot up with divine guidanced boltguns and flamers and assaulted with plenty of dreadnought and power weapon attacks. My basic plan is to combine the death cult assassins with the seraphim, repentias and penitent engines to sweep wide around cover and curl around their flank, while the sisters, retributors, inquisitor, and exorcist give and take fire as possible. The dominions are mostly for fun, 5 flame templates that have just short of a 70% chance of succesfully using divine guidance, not to mention the twin-linked scary fire from their transport. I will probably start with the callidus until the death cultists get painted. I would run DCAs and an eversor, but I wanted to use my repentia and didn't want to shell out for an inquisitor lord.
Monday, May 28, 2007
Sunday, May 27, 2007
Tournament: Dragon's Lair 5-26-07


Me and C2 played in the Dragon's Lair tournament yesterday. Attendance was terrible and only two other people showed up, so with three rounds scheduled, each of us had a turn to play one another. I brought my same guard army from last time (light infantry, bunch of tanks), C2 brought her usual 2k chaos force, another gent played iron warriors, and the last guy had a gravtank-heavy Eldar force. I think each of the armies was reasonably constructed and the games were all friendly and gracious. There were no total routs except for the games against Eldar. I know they wiped me out entirely, maybe save one chimera, and C2's chaos didn't fare too well against them either. I defeated C2, which was really for me the highlight; that demon prince usually fucks me up pretty good, but after I shot him a couple of times, a single guardsman clocked him in the chin and took him out of the game, sealing up the win. The Eldar player went home with 1st prize, winning all 3 of his games. Everyone else won once and lost twice.

I learned at least a couple of lessons. The game against C2 was the only win, and really the whole thing hinged on my left side, which, unlike the right side, was deployed close to my table edge. The right side had some good kills but they got run out real quick by the possessed, berzerkers, and bloodletters. When I deploy up near the line, I do badly. Period. I was doing it out of fear that I wouldn't have any good firing lanes first turn, but that's really a moot point considering my second lesson learned: forget choosing a side or going first with Guard in any tournament using strategy rating to determine order of placement and first turn. One die is crap. Against the Iron Warriors, I should have turtled in one of my corners rather than spread myself out along the whole long edge. Against the Eldar, I learned that if I get encircled by grav tanks it's over fairly quickly. Both games I think backing up a little would have helped me keep my lines free from falcon and wave serpent invasion. But who knows.
Friday, May 25, 2007
Tournament Fluff for Guard
The Walder System lies in the Segmentum Obscurus and comprises of several inhabited planets orbiting a single sun. The largest and most heavily populated of these is Tiefwald. Despite its greater distance from the Eye of Terror than other Obscurus systems such as Cadia or Mordia, its peoples are nonetheless faced with Chaos incursions on a regular basis, due in large part to the energy-generating capacity of the planet’s massive thermal core reactors. Fortunately these same reactors provide the Tiefwalder military access to an almost unlimited supply of plasma for use in munitions and fuel.
Trained amongst the densely forested terrain of their homeworld, all Tiefwalder regiments specialize in large-scale infantry ambushes. Each soldier is a rifleman first and foremost and receives lifelong training in accuracy and fire control. The Tiefwalder company commander typically exercises direct control prerogative for each unit. This has two main effects on their style of fighting. First, the platoon command elements are freed up to intercept skirmishers or conduct raids behind enemy lines with devastating short-range anti-armor weaponry. To be able to participate in such a raid is considered the highest (and probably last) honor that a Tiefwalder can earn. Second, the commander can more easily coordinate the various elements of the main ambush, collapsing sections of the front line at precisely the best moment to create new firing lanes and trap targets in the open. When an enemy charges in for close-quarters fighting, they will often find the Tiefwalder position abandoned and themselves caught in a new crossfire!
The Tiefwalder 14th, a.k.a. the Red Rifles, is traditionally a dedicated PDF regiment, though they have been deployed off-world in rare instances. In fact, they earned their nickname after their commitment to the Hannover System conflict, when they painted their weapons red in order to intimidate the invading Ork army. Since the regiment’s inception, they have also participated in actions against Eldar and Tau forces. Reports of skirmishes with other imperial forces are largely speculative and have never been verified.
Tournament Fluff for Chaos
Inquisitor Aristobulus,
Since my last dispatch, I was forced to abandon my post on Tapel’s World. No doubt you are by now aware of the warp disruptions that destroyed Tristan; after my astropaths became too distressed from the aftershocks to perform their duties, my staff transported most of our mission assets to one of our alternate locations, which I provided to you when we last met. From here I shall continue my long-range observation of the Demon Prince Toggog and his nefarious associates.
Toggog still commands at the point of the spear, his strength and savagery augmented by each terrible victory. We have determined that Slyrrin Archfiend now leads the Black Legion contingent of Toggog’s marauders. The fate of his predecessor, Gazak the Merciless, is unknown. Survivors of the encounter at Nogodrial claimed that he was destroyed by heavy ordnance bombardment, but had no direct evidence to support the allegation. It is known that, just before they laid siege to Tristan, Slyrrin’s group attacked a secret arms repository on Byre and made off with the contents, including an ancient and powerful boltgun prototype. On this raid, as well as on Tristan, Slyrrin and his subordinates were accompanied by two hulking entities, each much larger than a space marine in tactical dreadnought armor, that could by all accounts produce a variety of weapons fire using only their warp-twisted bodies. Their descriptions match those of the rare and mysterious “obliterator cult.” These profane abominations may well have played some part in Slyrrin’s ascendancy.
I once again humbly request that you send your most able men to combat this horrible enemy before it lays the entire northern portion of the sector to waste.
Your modest servant,
Talus Valerius VII
Sunday, May 20, 2007
Battle Report: Witch Hunters vs. Space Wolves 5-19-07
Bully vs. C. - 1500 points - Cleanse (Wolves choice)

Turn 1

Witch Hunters: The penitent engines are irritated at starting the game off in the rear and they roll for holy rage and sprint forward a bit. One of the battle sister squads settles into the area around the statue in their adjacent quarter and the tanks also swing wide into the same quarter.
Space Wolves: The Vindicator pulls up even with the rhino as it turns a bit itself, trying to get in position for the blood claws to hop out next turn.
Turn 2

Witch Hunters: The repentia, urged on by their mistress's neural whips, roll for holy rage and charge forward another full 6" to make contact with the wolves' rhino. As they lay into it with their savage eviscerators, the rhino explodes and four are killed. The battle leader, wolf guard, and blood claws are entangled in the smoking crater left by their destroyed transport. The witch hunters tanks swing further out.
Space Wolves: The terminators decide to come in a bit early and their drop pod deep strikes next to the seraphim. Luck turns a cold shoulder and only one of the flying nuns is destroyed by their sizeable wave of plasma and assault fire. Even worse, one of the plasma guns overheats and kills its bearer. Lesson: don't mess with the daughters of the emperor. The rune priest does his best to call up a blizzard and give his squad a little cover. The vindicator flips a huey and hauls back to its former position.
Turn 3

Witch Hunters: The seraphim use divine guidance to wipe out the terminators in righteous flame and bolter fire, blizzard be damned. The callidus assassin slinks out of her hiding place in the ruined chapel and charges toward the pinned blood claws, killing four immediately with her neural shredder and laying down four more in close combat. The repentia and mistress also charge into the blood claws and battle leader, but without frags they are destroyed before they can do any damage. A blood claw armed with a powerfist manages to destroy the assassin in the end.
Space Wolves: Both squads of grey hunters and the wolf scouts arrive on the table, killing five battle sisters with their opening salvoes of bolter and plasma fire. The machine spirits of the grey hunter drop pods target the aged inquisitor and manage to kill him with their storm bolters. Another plasma gunner is overcome by a weapon misfire. The battle leader and blood claws stagger away from their rhino crater and take cover in the chapel ruins.
Turn 4

Witch Hunters: The battle sisters shoot up the grey hunters, killing three of them and forcing them to fall back. The pentitent engines get holy rage again and charge into the closest drop pod. They try in vain to make it explode, leaving it a hulking wreck that the grey hunters can still hide behind.
Space Wolves: The grey hunters and wolf scouts move around the side of the destroyed drop pod and bring down one of the penitent engines with plasma shots. The other grey hunters regroup, and the vindicator pulls wide to threaten the immolator.
Turn 5

Witch Hunters: The last penitent engine charges the grey hunters in holy rage and kills three of them. The powerfists are unable to hit him back. The seraphim move closer to the middle of the table, and the immolator moves next to the exorcist and fires off its smoke launchers for a little extra protection. The exorcist shoots one of the blood claws in the chapel.
Space Wolves: The battle leader and last couple of blood claws move back away from the enemy armor. The vindicator fires its demolisher cannon at the immolator, shaking it. The scouts try to kill just one battle sister and bring their squad below 50% but cannot make it happen. The penitent engine puts down two more grey hunters.
Turn 6

Witch Hunters: The exorcist takes one last shot at the vindicator, but even with 6 shots is unable to do any damage. The seraphim fly over next to a drop pod in an attempt to straddle the two quarters. The penitent engine kills another two grey hunters, leaving only the powerfist troopers who are unable to return the favor, only shaking it. They break and flee from the crazed walker.
Space Wolves: The vindicator finishes the duel of the tanks by shaking and destroying the main weapon of the exorcist. One squad of grey hunters kill one of seraphim and the other one shoots at the cannoness but can't pierce her 2+ save.
Witch Hunters win, solid victory.
Saturday, May 19, 2007
Battle Report: Tyranids vs. Chaos 5-19-07
Bully vs. C. - 2000 points - Seek and Destroy

Turn 1

Tyranids: The horde moves up. One terminator is killed by the hive tyrant's venom cannon. The venom cannon in the warrior squad shakes the rhino.
Turn 2


Chaos: The havocs and bikes shoot up the broodlord's approaching squad, killing five. The terminators and obliterators kill two more in a second genestealer squad. The bloodletters arrive next to the berzerkers.
Tyranids: A tyranid warrior kills one berzerker with a barbed strangler, but the fearless squad cannot be pinned by the exploding seedpod. In assault, the broodlord smashes two of the khorne bikers, and his last genestealer brother is killed. Genestealers closest to the havocs charge into them, killing four immediately and the rest are wiped out with a sweeping advance. The genestealers hunker down in the crater.
Turn 3

Chaos: The terminators shoot four genestealers. The berzerkers charge up and shoot at the closest genestealer squad but miss or fail to wound them. Together with the bloodletters they charge into close combat and wipe out the genestealers, but every berzerker but the aspiring champion is killed in the process. The demon prince flies over cover and smashes into the termagants, killing six of them. The rhino plows into the nearby termagant squad.
Tyranids: Termagants finish off the berzerker aspiring champion with their fleshborers. The carnifex charges into the melee between the termagants and demon prince. The big demon tries to wound the carnifex but cannot. The lictor arrives and charge into the terminators along with the nearest squad genestealers. The terminators kill three genestealers but lose six of their own and flee off of the table. The victorious 'nids consolidate into the obliterators standing nearby.
Turn 4

Chaos: The chaos rhino drives into the tyranid warriors, spins around and kills one gaunt with its combibolter. The possessed grow tired of waiting in the rear and charge into the carnifex. The demon prince slaughters four more gaunts. The carnifex kills one possessed and only the possessed champion wounds the big monster back. The obliterators kill two of the offending genestealers. The bloodletters charge into the gaunts and kill fourteen of them, losing one of their own in the process.
Tyranids: The bloody hole where the possessed champion's powerfist punched into the carnifex stitches itself up as the wound regenerates. The hive tyrant and warrior squad charge into the big combat next to them. Both the carnifex and tyrant wound the demon prince, but the possessed champion punches another nasty wound into the carnifex. The tyranid warriors kill one possessed. The bloodletters finish off the gaunts. One obliterator is wounded and one genestealer is killed.
Turn 5

Tyranids: The lictor wounds the last obliterator, the warriors finish the bloodletters, and the last possessed are killed by the carnifex and other warrior squad.
Turn 6

Tyranids win, crushing victory.
And Now, Some Irrational Indulgence in Dice Superstition
The forces of karma sit up and pay careful attention when you’re rolling dice. The muted clack of hard plastic on felt is like a siren call to their subtle, mysterious manipulations. Arrogance, impatience, or maternal epithets are all bound to screw you in the end. Here are five things about dice and rolling that I’ve learned from innumerable games of 40k over the years. I’ve numbered them two to six because, honestly, who likes ones? Your opponent, that’s who.
2. Get your own dice - There’s no excuse for showing up without your own set. If you forgot them at home, don’t bother asking to borrow, just leave. Sit in your closet for the rest of the day and think about what you’ve done. You’re a jackass. Don’t use your opponent’s bones, even if convenient or expedient. If just one enemy die gets mixed up with a bunch of yours, the bad mojo will spread like wildfire in your hand and contaminate the whole set. The next thing you know, you just lost half your terminators to lasgun fire.
3. Match your curtains and drapes - Color coordinated dice might seem ridiculous, but nothing says devoted generalship like a set of dice that match your force’s color scheme. Besides the aesthetic benefits, you’re much less likely to mix up the dice pools, thereby preventing “creeping dice loss” (I imagine they go the same place as lost socks?), as well as warding off nasty enemy dice cooties. Seriously, that shit is real.
4. Slow your roll - A calm, collected throw is always best. Negative energy from arrogance or frustration might not affect the roll result itself; sometimes flying dice have a way of seeking out the most susceptible model on the board and demolishing it entirely. The slightest cocky swagger in your pitching arm could send that perfectly painted mini (perched precariously on yonder wrecked watchtower) toppling down to an early grave in your bitz box.
5. Two is better than one - Five-sixths might seem like a huuuuuge fraction, but it isn’t. That single centered dot has ears, and it’s listening to your words very carefully. Speak its name, and watch it rise to the top to answer your call. I’m taking a risk myself by printing this, but don’t ever say you need “anything but a one.” What you want is a “two or better.”
6. I’m killing you with mind bullets - I’ve never seen any proof that human beings can use telekinesis, but maybe (just maybe) we just don’t know how to look for it. Visualize the results you need and chant away, preferably to yourself. More than once a plaintive wish has pushed a wavering die over in the right direction.
Friday, May 18, 2007
Karel's Wrapup
Thanks to everyone who played in the tournament last weekend. I know both I and C. had a great time, and I think everyone present would be willing to play another in a couple months. Overall, the game size (1500) and random missions worked pretty well, but we may want to retool the way we pick the pairings. Eric was a really good sport and I think he learned a lot, but experience-wise his second round was a bit of a mismatch.
In the future, I think we should consider pairings based on seeds for the 1st game. A player’s seed could be determined by rank in their last tournament, and maybe have newcomers always start out at the bottom for their first tournament. For second round pairings and overall tourney ranking, we need to decide whether we want to use total victory points or have folks earn what I’ll call “juju-points,” based on what type of victory/loss they experienced. I think the latter is most common at normal tournaments; it’s normally used at Dragon's Lair to good effect. The two methods produce slightly different results - in the Karel's Folly tourney, using the total VP method resulted in this ranking (the official results):
1st: C.
2nd: Mack
3rd: Bully
4th: Marcos
5th: Pat
6th: Eric
Just for the sake of providing an example, using the sliding scale the result would be:
Tied for 1st: C. & Bully
2nd: Mack
3rd: Marcos
4th: Pat
5th: Eric
In this case, it didn't make much of a difference (ok, besides bumping me past Mack - suck it, Necrones de Guerra!), but it decides the 2nd round loser/drawer brackets a bit better. We can still draw for pairings in cases of juju-point ties or to keep folks from playing the same person twice in the same tourney.
Wednesday, May 16, 2007
Ghost Ride The Whip

Tuesday, May 15, 2007
Karel's Folly Narratives
In the wilderness surrounding Tristan's capital city of Gallioli, Toggog and his minions attempted to ambush and loot a heavily armored Tau hunting party but were fought off, the battle ending in a stalemate. Later, when the demon prince's army encountered a rival band of chaos raiders amongst the ruins of the city, his rage was too great to contain and they slaughtered the rivals to the last man. Skulls are skulls, after all, and Khorne must be appeased...
After their rok transports were caught in a sudden warp displacement, a marauding band of orks from Waagh! Mahkook found themselves stranded on the surface of Tristan. As they began to set up a staging area for later assaults on the nearby human settlement, they were detected and attacked by elements of the 14th Tiefwalder Armored Infantry Regiment, sending them fleeing into the urban wasteland. Unfortunately, this placed them directly in the path of the newly awakened necron juggernaught. The plucky greenskins put up a valiant fight against the silent robot phalanx but were defeated in the end.
A large group of chaos raiders traveled through a warp storm and descended upon the Tristan wilderness. As they went about scouring the planet's surface for valuable slaves and munitions, they unknowingly disturbed a Necron battle group from multimillenial slumber. Rising from their newly exposed tomb, the somber automatons repelled the chaos raiders and eventually sent them running for cover amidst the ruins of nearby Gallioli. As the chaos lord attempted to reorganize his battered company, they were suddenly set upon by another chaos faction and slaughtered to the last man.
A hunting party of Tau were pursuing a contingent of orks from Waagh! Mahkook when their ships were caught in a freak warp storm and sent hurtling halfway across the galaxy to the surface of Tristan. As they surveyed their new surroundings, they were suddenly attacked by the Demon Prince Toggog and his ruthless band of chaos veterans. After some heavy initial losses, the Tau managed to find their footing and repel the attacking psychotics long enough to get away. Eventually they picked up the trail of their original ork quarry, but it led them into an imperial guard encampment in the ruined city. Battle ensued, and the Tau were narrowly defeated.
Units from the 14th Tiefwalder 3rd company were deployed as auxiliary planetary defense forces on Tristan. Just before the traitor Karel declared secession, he sent the loyalist Tiefwalders out into the Tristan wilderness to investigate a rather dubious account of xeno invaders. After being pummeled overnight by intense storms, they came upon a recently arrived party of orks from Waagh! Mahkook. After a day of pitched battle, the orks were routed and the guard pursued the surviving enemy back into Gallioli. Startled to find the capital city in ruins, destroyed by unknown forces, they made camp and evaluated their next course of action. It was then that a tau hunting party stumbled onto their position and battle was joined. Tanks fought tanks and losses were heavy for both sides but the tau were eventually defeated.
An age-old cell of necrons was reactivated when the monolith capping their tomb was exposed by violent warp storms and disturbed by marauding chaos looters. After annihilating the band of pirates, the necrons swept into ruined Gallioli. From afar they perceived a roving band of orks and moved to intercept them. After these new opponents were similarly defeated, the necrons simply resumed their pilgrimage through the desolated streets, following their ancient impulse to wander the planet until all usurpers were ground under their metal heels.
Battle Report: Chaos vs. Chaos 5-12-07
C. vs. Eric - 1500 points - Annihilation

Turn 1

Chaos (Eric): The predators and havocs kill four of C.'s havocs with heavy weapons. One squad of berzerkers moves up.
Turn 1

Chaos (C.): The surviving havoc targets the nearest predator with his lascannon, stunning and immobilizing it. The rest of the army moves forward, including the demon prince (off-camera at the bottom).
Turn 2

Chaos (Eric): One predator tries to move away from the approaching demon prince, while the other swings wide and takes down one of the terminators. On the far side, a squad of berzerkers goes crazy and charges toward C.'s rhino. The obliterator moves up with the berzerkers.
Chaos (C.): Blood rage must be answered by blood rage! The bloodletters answer the call, and together with C.'s berzerkers they charge forward into Eric's obliterator and berzerkers. They bring down the obliterator and four berzerkers, killing the last by outnumbering him. They consolidate into Eric's second squad of berzerkers. One predator is shot up a bit, and the demon prince gets closer to the other predator.
Turn 3

Chaos (Eric): The chaos marines try to stop the enemy rhino but inflict no damage. The predator shoots up the terminators but can't make get them to fail an armor save. In assault, C.'s berzerkers and bloodletters finish off their rival khorne freaks and consolidate into the chaos lord's squad of marines.
Chaos (C.): The obliterators destroy the stunned predator. The demon prince swoops in on the chaos havocs and wipes them out with his massive axe. The possessed join in the massive assault at the top and kill a few chaos marines.
Turn 4


Chaos (Eric): The chaos rhino pulls around and unloads another big squad of marines. They shoot up the bloodletters but when the smoke clears, only one has been killed. The chaos lord and several marines are killed in the large melee.

Chaos (C.): The demon prince charges the predator, destroying it. The possessed and last berzerker finish off the squad of chaos marines in close combat, but the berzerker is killed. The bloodletters charge the marines that shot at them, killing three of them and losing one of their own.
Turn 5

Chaos (Eric): One more marine is killed in assault by the bloodletters.
Chaos (C.): The possessed charge the rhino and trigger an explosion that kills one nearby marine and one bloodletter. The bloodletters finish off the rest of the marines.
Chaos (C.) wins, victorious slaughter.
Monday, May 14, 2007
Battle Report: Imperial Guard vs. Tau 5-12-07
Bully vs. Marcos - 1500 points - Cleanse

Turn 1

Tau: The stealth suits, having infiltrated so close to the guard flank, open fire on the lascannon teams, killing four of them. The hammerheads tear up one of the infantry squads, sending it running off the table.
Turn 1

Imperial Guard: The demolisher moves left and fires on the stealthsuits, hitting four but killing only two of them. The sentinels and lascannon team shoot up one of the piranhas, shaking it. The ion cannon hammerhead is stunned by mass missile fire. The heavy bolter teams move into the tower.
Turn 2

Tau: The hammerheads zip into their adjacent quarter and fire their weapons, destroying the leman russ and killing two guardsmen in the far right squad. The devilfish kills one of the guardsmen in the tower. The intact piranha flies over the walls and tries to bring down the demolisher with its fusion blaster, but -alas- misses the crucial shot.
Imperial Guard: The basilisk goes fires indirectly at the battle suits but the shot scatters and hits the devilfish, shaking it. The heavy bolter teams destroy the piranha's weapon, and the lascannon team finishes it off. One sentinel moves to attack the approaching stealthsuits but misses, and the other fires across the battlefield, stunning one of the hammerheads. The first squad to target the ion cannon hammerhead brings it down with a missile. Additional rocket and plasma fire kills one battlesuit and inflicts a wound on a second.
Turn 3

Tau: The unshaken hammerhead shakes the basilisk. A devilfish darts around the chapel and its passengers disembark. The battlesuits and the fire warriors' pulse rifles bring down 4 guardsmen. The shas'el jumps out of cover and kills two of the guardsmen in the heavy bolter squad. The stealthsuits attack the threatening sentinel and it explodes, but they and the nearby lascannon team are unharmed. The remaining piranha circles further around the imperial guard flank.
Imperial Guard: The demolisher turns and fires on the squad of fire warriors, killing four of them and destroying the devilfish's smart missile system. The nearby guardsmen wipe out the rest with plasma and lasgun fire. The surviving lascannon team kills two stealthsuits with lasgun and lascannon fire and the hellhound finishes off the last two. The shaken basilisk zooms forward to move into cover.
Turn 4

Tau: One of the devilfish moves over and kills two guardsmen with its last weapon. The other devilfish immobilizes the sentinel. The hammerheads kill one guardsman and destroy the hellhound's flame turret. The last piranha's gun drones detach and move towards the guard position.
Imperial Guard: The stars align for the emperor's dogmen and they make some important shots: the basilisk fires indirectly at a hammerhead and destroys it on a glancing hit. The intact sentinel rolls to immobilize the other hammerhead, and when its decoy launchers attempt to change the damage result, the reroll is a 6 and it goes down for good. The demolisher hauls ass to stay away from the piranha's fusion death. One of the infantry squads runs into the cratered section of road to grab some cover. The hellhound stuns the devilfish.
Turn 5

Tau: The battlesuits jump from cover and kill one of the guardsmen in the far right squad, breaking them and sending them off the table.
Imperial Guard: Guard missile launchers blow up the stunned devilfish, and the lascannon team and hellhound finishes off the gun drones. The basilisk backs up to get in position for one last indirect shot on the battlesuits.
Turn 6

Tau: The last devilfish kills one guardsman.
Imperial Guard: The basilisk fires off the last guard shot of the game, hitting the battlesuits but failing to wound either of them. The hellhound and infantry squad move to contest both adjacent quarters (the infantry squad was straddling the line and rolled to occupy the crucial quarter).
Imperial Guard wins, solid victory.
Battle Report: Necrons vs. Orks 5-12-07
Mack vs. Pat - 1500 points - Take and Hold

Turn 1

Necrons: The necron forces advance and the destroyers take down 2 grots and 6 boyz with their heavy gauss weapons.
Turn 1

Orks: The orks charge forward into the fray, firing off big shootas and rokkits, and bring down 2 warriors. The looted leman russ looses its battle cannon, taking down three more warriors and wounding the VoD lord.
Turn 2


Necrons: Three warriors reassemble and continue their silent advance. Two more boyz and a couple of grots fall to the necrons' green beams. The monolith nears the center of the battlefield.

Orks: The leman russ again lets fly with the battle cannon and brings down one warrior. Three more warriors are killed by rokkits and big shootas.
Turn 3


Necrons: The necron technology is having a good day and 3 more warriors stand back up. A squad of warriors teleports through the monolith, and together with the flux arc, disable the orky dreadnought, blowing each of its arms off in turn. The monolith also hits a grot and a boy, and the destroyers kill four boyz themselves.

Orks: The leman russ scores a kill on the destroyer squad, and the disabled ork dreadnought is stilll able to bring down one of the warriors in assault.
Turn 4

Necrons: The ordnance blast was too much for the destroyer, and he stays down. The warrior climbs back to his feet and his squad again teleports through the monolith. The squad and the monolith open fire on the killa kans, immobilizing one and wrecking the other. The destroyers wipe out five grots.
Orks: The rokkit buggies sweep around and kill two necron warriors. The warboss slowly but surely approaches the meat grinder. The boyz charge the necron warriors, killing one and losing two in the process. They fail their morale check and fall back, also failing their mob check.
Turn 5

Necrons: Two warriors stand back up, two stay dead. They fire on nearby grots and boyz, killing several of them. The dreadnought is immobilized.
Orks: Rokkits and big shootas drop a destroyer and a few more warriors, and the warboss wades into the squad in front of the monolith, killing two of them with his power klaw. The big mek sidles up to the dreadnought and fixes up the big machine, restoring its ability to move.
Turn 6

Necrons: The destroyer and two warriors get back up. Massed gauss shooting kills 7 of the rokkit boyz, bringing them below scoring capacity.
Orks: The orks make a last ditch effort to take down as many necrons as possible. Two warriors are killed by the battle cannon. Somehow the warriors near the monolith are able to bring down the warboss. The big mek fixes up the immobilized kan, making it a scoring unit and earning the orks a few more victory points.
Necrons win, solid victory.
Sunday, May 13, 2007
Battle Report: Necrons vs. Chaos 5-11-07
Mack vs. Eric - 1500 points - Secure and Control

Turn 1

Necrons: The destroyers draw first blood and kill one of the havocs. Warriors and the monolith move forward.
Turn 1

Chaos: One of the squads of berzerkers rolls blood rage and charges through rocky terrain on their way to the warrior squad in yon forest. One of the predator tanks and the obliterator move out and fire on the monolith, inflicting no damage. The chaos bikes zoom forward and drop one of the warriors in the closest squad.
Turn 2


Necrons: The necrons ready their gauss rifles and flay up the bikers and one of the berzerkers approaching on the far side.

Chaos: Both of the berzerker squads go crazy and charge the warriors squads closest to them. On the necrons' left, the berzerkers go last, having charged into cover, and lose three of their number. Though their champion's powerfist drops two warriors in return, the fearless squad misses two armor saves from being outnumbered. The other berzerkers kill 2 warriors and one of their own is killed.
Turn 3

Necrons: One of the warriors felled by the berzerkers is reanimated, and their squad teleports through the monolith, out of combat. The monolith, destroyer, and other warriors take apart the stranded berzerker squad, killing everyone but the champion.
Chaos: The berzerker champion charges into the destroyers, killing three with his powerfist and sending them fleeing off the board. The rhino rolls around the monolith and its passengers disembark, shooting down two of the necron warriors in a hail of bolt fire.
Turn 4

Necrons: The foot lord uses his veil of darkness to teleport himself and a squad of warriors across the table to nearby the obliterator. For all their gauss fire, they are unable to inflict any damage on the hulking monstrosity. The monolith stuns the predator tank with is flux arc.
Chaos: The havocs pick off two of the necron warriors, and the rhino whips around to try and tank shock the necron warrior squad near the obliterator. One of the warriors tries to shoot it down and is run over for his trouble. The lord and his squad of marines approach the squad of necron warriors in the forest on the far side of the field.
Turn 5


Necrons: The monolith powers up its particle whip and annihilates 8 of the nearby chaos space marines. The surviving two fall back in horror at the green beamy death that had enveloped them as the warriors and lord immobilize the rhino with more of the same.

Chaos: The lord and his retinue of chaos marines charge into the necrons on the forest hill, killing one but losing two of their own in trade. The rhino stands down on its guns and manages a self-repair.
Turn 6

Necrons: The foot lord and warriors bring down the obliterator with another hail of gauss fire. The destroyer lord sweeps around and charges into the mass melee between the warriors and chaos lord and marines. Four marines and one necron warrior fall.
Chaos: The chaos havocs drop two necron warriors in front of the monolith.
Necrons win, solid victory.
Subscribe to:
Posts (Atom)

